Instructions
- Wash your hands and be sure all of your equipment is clean.
- Cut cabbage in half and remove the cores. If the outer leaves are wilted, throw them away. Cut the remaining cabbage into large chunks and feed into your food processor, using the largest grater blade, or a slicing blade, to shred the cabbage. If you don’t have a food processor, chop the cabbage finely with a knife.
- Transfer the shredded/chopped cabbage to a large bowl. Sprinkle with 3 Tbsp. salt and use two spoons to toss until the salt evenly coats the cabbage.
- Transfer the cabbage to your Fido jar. It won’t all fit at first. That’s OK – leave the extra in the bowl, and it will get added later.
- Cover both the jar and bowl with clean dry cloths, and let the cabbage “sweat” for 30 minutes.
- Once the 30 minutes have passed, use a large spoon or meat pounder to gently push down on the cabbage in the jar. It will compress and release its natural juices, freeing up more room in the jar. Add the remaining cabbage from the bowl and set the timer for another 30 minutes.
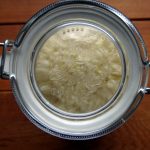
- Compress the cabbage again. Its natural juices should rise up above the shredded cabbage itself. If it doesn’t, you can add a little filtered water as needed. Leave two inches of airspace at the top of the jar.
- As long as you’re using a Fido jar, no weight is needed. Simply clamp the jar shut. (For an explanation, click here.) The first week of fermentation is the gaseous stage, and the cabbage will expand upward. If your jar is very full, stick a plate under it. Sometimes a little liquid will seep out under the rubber gasket. This isn’t a problem. The beauty of the Fido jar is that it lets excess fermentation gases out without letting oxygen in. (Oxygen causes mold.)
- Put a piece of tape on the jar with today’s date, and set it out of sunlight, but someplace you won’t forget about it. Let it ferment for 30 days. Don’t open the jar during fermentation (this lets oxygen in which can lead to mold). If your house runs hot, ferment it 3 weeks. If your house runs cold, let it ferment 5 weeks. The best flavor and nutrient content develops between 60-75 degrees. Don’t try to ferment in temperatures above 80 degrees, or the wrong type of bacteria takes over.
- Transfer the kraut into smaller containers and refrigerate. I eat mine in a month, but it should keep in the fridge for at least 6 months
Notes
- If you’ve only eaten storebought sauerkraut before, or have done shorter ferments at home, start slowly when eating this version. It has a much higher probiotic count and can cause some digestive symptoms if you eat too much too fast. Start with just a teaspoon, and work your way up to 1-2 Tbsp. per meal. Fermented foods are meant to be condiments, not major food groups. A little bit goes a long way.
- Many internet recipes for homemade sauerkraut use a short fermentation time of 3-7 days, but the fermentation process has hardly begun at that point. There are three stages of lacto-fermentation. This website shows that it takes about 20 days for all 3 stages to be reached. Traditional sauerkraut recipes have the fermentation time at 3-5 weeks, depending on room temperature.
- If you don’t have a Fido jar, you can still use this no-pound method in your preferred fermentation vessels. However, you will have to use a weight, and it’s no longer a no-fail method.
- Prep Time: 1 hour
- Category: Healing Foods
- Method: No-Cook, Fermented