
“Instant gratification takes too long.”
~ Carrie Fisher
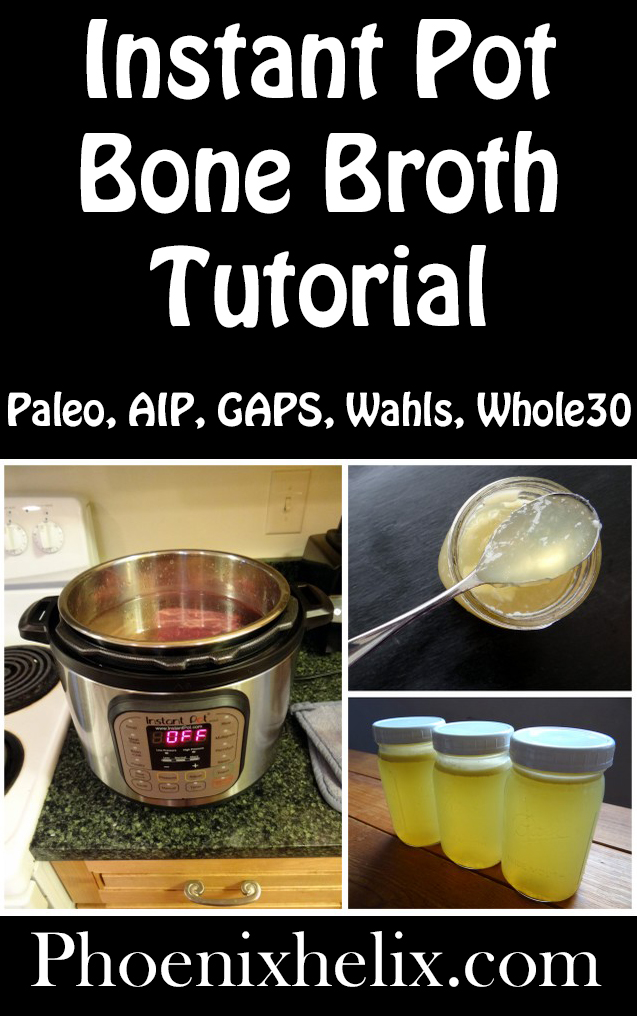
Instant Pot Love
I have a lot of friends in the paleo community, and they have been buying Instant Pots left and right. I finally joined the bandwagon this January, and I admit it – I’m smitten. I feel about this Instant Pot the way I used to feel about my Kitchenaid Mixer (remember those pre-paleo baking days?). It just makes life so much easier!
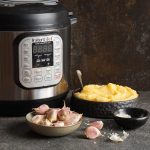
The Instant Pot is many kitchen appliances in one. It’s a slow cooker, a pressure cooker, a rice cooker, a yogurt maker, and it even has a sauté function where you can brown meat before cooking it for added flavor. How impressive is that? But if you only use it to make your weekly bone broth, your world is still going to be rocked. Why? It makes 24-hour broth in just 2-1/2 hours.
If you’re new to the Instant Pot, listen to Episode 55 of the Phoenix Helix podcast for tips from the experts.

Bone Broth FAQ
- What are the benefits of bone broth? When you simmer the bones, you release a lot of nutrition into the broth, including: marrow, collagen, gelatin, glycine, proline, hyaluronic acid, chondroitin sulfate, calcium, phosphorus, magnesium, and potassium. There’s a reason many of these items are sold in supplement bottles in the health food store. They’re building blocks for your body, and they’re especially beneficial for reducing inflammation and helping our bodies heal. For details, check out this post from Marks Daily Apple and this one from The Paleo Mom.
- What bones should I use? Bones in general contain a lot of nutrition, so you have a lot of options. You can simply save bones from your other meals. Put them in a container in the freezer, and once you have 3 pounds, make some broth. It’s fine to mix up the bones of different animals. If you’re buying bones, I recommend a variety of (1) marrow bones, which are sometimes called pet bones in the grocery store, (2) meaty bones, which give the broth a nice flavor, and (3) gelatinous bones, like oxtail, pig/beef/chicken feet, or knuckle bones. Whatever you choose, I do recommend seeking out organic bones if you can. You don’t want toxins in your bone broth.
- How do I make it gel? I’m going to let you in on a little secret. Even if your broth isn’t jiggly, it doesn’t mean there’s no gelatin in it. It just means it’s not so concentrated that you can see it. The amount of gelatin is related to 2 things: (1) the bones you choose, and (2) the amount of water you use. I mention above that some bones are more gelatinous than others, so if you want a thick broth, be sure to include some of them in every batch of broth. In my experiments, I’ve found that adding a pig’s foot makes the most gelatinous broth. The second factor is water. If you have too much water compared to bones, your broth will be diluted. The pressure cooker doesn’t let water out of the pot, whereas slow cookers and stove top pots do (automatically concentrating the broth). If you don’t choose highly gelatinous bones, reduce the water. That said, remember this: gelatin is just one of the many healing ingredients in bone broth. For example, marrow bones have almost no gelatin, but they have tons of marrow (also a superfood). So don’t worry too much about the thickness of your broth. It’s nourishing, no matter what.
- Where can I buy bones? Try your local farmers, the meat counter of your grocery store, and Asian markets. If you strike out locally, there are vendors online.
- Is it true that Instant Pot bone broth is lower in histamines? While no scientific studies have been done, many people on a low-histamine diet say they can tolerate pressure cooked broth, where they can’t tolerate slow-cooked broth.
- How I can make broth without an Instant pot? I made broth on the stove for 2 years. It’s easy to do; it just takes longer. You can find my 24-hour bone broth recipe here.
- How do I drink it? I like the flavor of bone broth, so I drink a cup with dinner every night. Sometimes I’ll add some minced garlic for its nutritional benefit. Sometimes I’ll stir in a raw egg yolk, which I’ve been able to reintroduce successfully. Sometimes I’ll add some fresh herbs. However, if you don’t like drinking broth straight-up, use it as a base for soups. Here’s an AIP-Friendly Soup Recipe Roundup.
Instant Pot Bone Broth Tutorial (Paleo, AIP, GAPS, Wahls, Whole30)
- Total Time: 2 hours 40 minutes
- Yield: 3 quarts
Ingredients
- 3 lbs. bones (choose a variety; frozen bones are OK)
- 1 tsp. sea salt
- 1 Tbsp. apple cider vinegar
- 1/2 medium onion
- 1 small clove garlic
- 3-inch piece of celery
- 3-inch piece of carrot
Instructions
- If your Instant Pot is new, wash it well prior to use.
- Place all of the ingredients in the Instant Pot, and add water to 1-3 inches below the “Max” line. (Less water makes a more gelatinous broth.)
- Be sure the gasket/sealing ring is in place on the cover. Lock the cover in place on the pot. Turn the pressure knob to the “Sealing” position (the knob will stay loose, but it does need to point in the right direction).
- Press the manual button once. You'll see the display light up to indicate high pressure 30 minutes. Press the + button until it reaches 120. Wait 5 seconds, and the pot will beep and the display will say ON. This means it's heating up and building up pressure, which takes about 30 minutes. Once full pressure is reached, the display will switch and start counting down from 120. Update: If you bought your Instant Pot in 2018 or later, they updated their display panel. The “manual” button is now called “pressure cook” – this is the button you'll press.
- When the broth is done, the Instant Pot will beep and the display will switch to L0:00. This is the default “keep warm” setting, and the clock lets you know how long it's been kept warm (up to 10 hours).
- At this point, you can let it naturally depressurize by leaving it alone for about another hour. Or you can quick-release the pressure, by turning the pressure knob to the “Venting” position. Be careful – when you do this, hot steam is going to come out of that knob. Just be sure to keep your hands and body clear, and turn the knob just slightly at first. As more pressure is released, you can turn it completely into the venting position, and you'll feel the knob lift up. Once all the steam is released, you can open the pot. A safety measure on the pot is that the lid is pretty much impossible to turn, when it's still under pressure.
- Use a slotted spoon to remove the bones, meat and vegetables. Throw away the meat and vegetables, but you can freeze the leftover bones and re-use them in your next batch of bone broth. Just be sure you always add at least some new meaty/gelatinous bones to each batch.
- Pour the broth through a mesh strainer into a large bowl. I usually let it sit for 15 minutes or so, so any particles in the broth sink to the bottom of the bowl. I then transfer the broth into mason jars and pour out the last cup (with the particles). Those particles aren't harmful; they're just parts of the meat and bones that the strainer didn't catch. I just like a “prettier” clear broth.
- Let mason jars cool for one hour on the counter, and then refrigerate. If there's a solid layer of fat on top of the jars, they work like a protective seal, and you can keep the broth in the fridge for weeks. However, if you only have a thin layer of fat, or the fat is cracked, keep the broth in the fridge a maximum of 5 days. You can also freeze broth for up to 6 months. Just let it cool completely in the fridge; then transfer to freezer-safe containers. Most mason jars will crack in the freezer, unless they have completely straight sides. The biggest straight-sided jars I've found are 24 ounces. I use those when planning to freeze broth.
Notes
- This recipe was written for the 7-in-1 6-Quart Instant Pot (the most popular model). Generally speaking, Instant Pots behave similarly from model to model. But if you have a different model, you may have to adapt the instructions slightly. If yours is the larger 8-quart model, you can either increase the ingredients by 1/3 or decrease the amount of water you add to the pot.
- You may have noticed the vegetables in this recipe are much smaller than those used in a traditional bone broth recipe. This is because the pressure cooker infuses the broth with the vegetable flavor. I found that if I added full sized vegetables, the flavor was too strong. Some people wait and add full-size vegetables during the last 30 minutes of cooking, but this requires depressurizing and re-pressurizing the Instant Pot. I'm all about “easy” cooking, and in my experiments this recipe achieves the same flavor without that extra step.
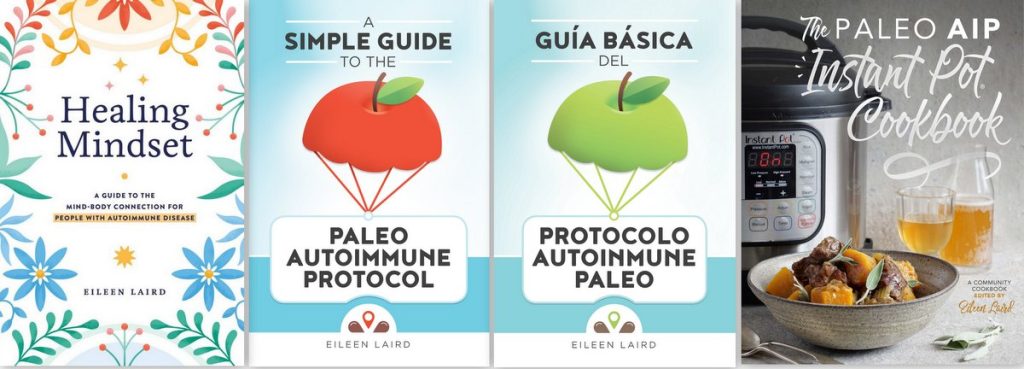
- Looking for more AIP Instant Pot recipes? Check out The Paleo AIP Instant Pot Cookbook.
- Prep Time: 40 minutes
- Cook Time: 2 hours
- Category: Healing Foods
- Method: Instant Pot
You May Also Be Interested In


Also, I am a low fodmapper and cannot have garlic or celery so I only included a small carrot in the recipe…is that ok? I’m assuming the addition of vegetables is optional? Thanks
Yes, the addition of vegetables is optional. They add a little extra flavor and nutrition. As you experiment with bone broth, you might find other vegetables you enjoying adding alongside the carrot, or keep it simple and use bones only.
Thanks, that works. Also, I want to share my bone broth with my dogs, is it ok to cook it without salt?
Absolutely.
I just made the bone broth using a king pro instapot…I used multi bones as mentioned and it included pigs foot. I just checked now and the feet are still rather firm – I was expecting that it would be really soft, like I slow cooked it. Is my expectation incorrect and is my bone broth well and truly done. Tasted bone broth light.
Hi. I’m not familiar with the King Pro pressure cooker, so I’m not sure I can advise you. This recipe was written with the Instant Pot in mind. I imagine the controls are a little different. I recommend looking at your product manual to make sure you selected high pressure correctly when starting the recipe. If you don’t feel like it’s done, you could certainly use the same ingredients to cook it again.
Can you make this without the vinegar? I can’t have that.
Hi Amber. You can substitute lemon juice instead. The acid helps extract minerals and collagen from the bones.
Hi Eileen, thanks so much for this tutorial! I got an instant pot recently and haven’t put it to use yet, and I’m excited to make my first batch of bone broth. I have a question that I didn’t see when skimming the comments, hopefully it’s not a repeat… I will be using bones from some recently cooked whole chickens and I am wondering how clean they need to be. They still have little bits of meat and other tissue (for lack of a better term) and I’m not sure if that’s ok or not. Any advice would be great!!
Thanks
AnnaLisa
AnnaLisa, that’s actually good. The meat adds flavor and the other tissues contain healing nutrients that will get absorbed into the broth. Enjoy your first pot!
I finally made my first batch of broth! It was also my first run with my Instant Pot yay! Followed your tutorial and ingredients exactly and it came out great! Thanks so much, again, for this awesome article.
AnnaLisa
AnnaLisa, that’s wonderful! Thanks so much for taking the time to let me know. Welcome to the Instant Pot Broth Club. 🙂
Thanks Eileen! I didn’t see any instructions for the IP there though. Can it be done in the Instant Pot, and if so, how long/what settings?
Oh, sorry Sharon! I didn’t realize that wasn’t an Instant Pot recipe. I’ve never made fish broth, so I can’t really guide you. It should take less time than other bones, though. Maybe try 30 minutes at high pressure? But that’s a guess, not a guarantee! Happy experimenting.
Anyone have good instructions for FISH bone broth (freshwater – like Striper)? I know and love my chicken bone broth, but it’s fishing season for us!
i tried to make bone broth in my new instant pot. Followed the directions. i heard steam releasing the entire time ? 2 hours later there was NO liquid in the pot, well there was about a cup pf liquid. I had filled the pot to below the top measurement with water, enough to cover the bones. I called Instant pot,, and they decided to send me a new lid. The ring was in place when I was making the bone broth. What did I do wrong, The black heavy pressure knob seems loose no matter which direction it is directed towards.
Hi Lynn. You need to make sure the knob is pointing in the “pressure” direction. It will feel loose, but that’s OK. Its placement is what’s important. If you didn’t get a defective lid, you probably had the knob pointed the wrong way. For bone broth, it takes a while to build up pressure, then right before it reaches full pressure you’ll hear a little steam which lifts the metal bolt up and seals the air in the pot. It will suddenly go quiet and start counting down. If you hear steam AND the timer has started counting down – that’s a problem.
Thank you Eileen. I’ve made chicken soup in it 2x and it comes out fine. yesterday I used the pot to try again, this time making chicken soup again, i pressed soup, the timer went to 120 instead of 30,, it is keeping the setting from the time i tried making bone broth, which was the last time I used it And it says low pressure. I lowered the minutes to 30. and tried it. Soup came out fine. the digital display / mechanism on the pot itself ,, how do I switch from low pressure to high pressure. Making chicken soup, should it be on low or high pressure ? or just push soup and let it decide, but adjust time to cook to 30 if it shows more minutes? Thank you and I want to say I appreciate the time you take answering questions !
Hi Lynn. If you don’t already have the Paleo AIP Instant Pot Cookbook, it contains an Instant Pot Tutorial on page 6 that you’ll find very helpful. Otherwise, your Instant Pot manual should also have a guide to the buttons and functions. If it’s holding settings, there’s a cancel button in the lower right corner. If that doesn’t work, try unplugging it. If you continue to have difficulties, contact Instant Pot Support. To answer your question, there’s a “Pressure” button that allows you to switch between low and high pressure. I don’t have a recipe for Instant Pot Chicken Soup on my blog, but there are a few varieties in the cookbook. However, since you’ve made it twice before, it sounds like you’ve already come up with a recipe that works. You just need to get to know your pot. 🙂
Hi Sharon. Fishing season – how great! There’s a Fish Broth recipe in the Paleo AIP Instant Pot Cookbook, but I here’s one I found one for you online as well: http://paleopumpkin.org/fish-bone-broth/
Just got my Instant Pit last week for my birthday and roasted a turkey yesterday and wanted to make broth. I followed this to a T and except in the beginning when was steam was escaping and I realized the lid was not on properly, once I put it back on. 120 minutes and it is done. So easy to do. Thank you for the step by step instructions. Now I will always make my broth this way.
Francine, that’s wonderful! Thanks for sharing. And good eye on the steam and fixing the lid before that became a problem.
Yay…I can’t wait to try! I’ve been collecting bones for a while!
Enjoy! It’s always exciting to make your first batch.
My instant pot allows me to select a time longer than 120. Just FYI 🙂 trying this out now!
Hi Allison. Do you have the 8-quart Instant Pot? I heard that allows for longer cooking times. This recipe is written with the 6-quart model in mind, but I’ve gone ahead and removed the “max” note from the recipe, since more people are buying the bigger pot. If you do have the larger model, you’ll want to either increase the ingredients by 1/3 or decrease the water you add to the pot. Enjoy your broth!
Hello. I’ve just bought an Instant Pot on the web (a few moments ago so it hasn’t arrived yet!) but I do want to buy your new e-book for AIP Protocol. However, I use an app called Paprika for my recipes and my past experience with e-books is that I’ve been unable to lift the recipes and add them to my Paprika app (whereas I can do this from the web). I don’t want to buy the book unless I know how to do this. Can you clarify in any way? (PS I have looked at the Paprika Help section and am none the wiser.)
Hi Celia. I’m not familiar with Paprika, so I can’t guide you. This sounds like a question for their help department, and honestly – it may not be possible. They may ask you the format of the ebook. It’s a PDF.
Please explain why filtered water must be used. Why couldn’t the water from the refrigerator be used that goes through a filter? Or even tap water from a well?
Thanks.
Hi Nancy. I actually don’t say in the recipe that filtered water must be used. It all depends on the quality of your water. If you live in the city where chlorine and other contaminants are common in tap water, filtering is wise. We don’t want to drink chemicals. If you live in the country and drink spring or well water that is clean, filtering may not be necessary. Clean water in general is an important part of any healing diet.
Your directions for bone broth say to press Manual once and the number 1 will appear. In my case, 2 appears. I’ve started over several times. Still 2 appears. I press Manual again, and it remains 2. What am I missing? Also, dear Eileen, my instruction booklet says 240 is the max. I am so confused. I want to make bone broth! Help!
Hi Gloria. Actually, the instructions say that when you press Manual, the display lights up to show high pressure and a default 30 minute cooking time. It doesn’t show 1 or 2. You then use the +/- buttons to increase to 120 minutes. If your Instant Pot is behaving differently, you must be using either a different model or a different brand. This recipe is written for the 7-in-1 6-Quart Instant Pot (the most popular model). Most Instant Pots work similarly but some allow a longer cooking time. If yours is very different, you’ll have to read your manual and adapt the recipe accordingly. But the general cooking principles remain the same. Don’t panic. You will get to know your Instant Pot, and it will become a favorite tool in your kitchen!
Eileen, in my neighborhood I can easily buy necks, backs, feet & wings. How many pounds would fit in with your recipe? I just got an Instant Pot and I love it. Have been dying to make bone broth in it instead of my slow cooker.
Hi Anna. Since they’re different shapes, that would depend. Chicken backs tend to take up a lot of room, but they also have a lot of flavor and cartilage for nutrients, so you may not need a full 3 pounds if they won’t fit. Wings and feet are more compact, so you should be able to follow the recipe as written. If you’ve purchased the Instant Pot Cookbook, it has a recipe specifically written for chicken feet also. Enjoy your new Instant Pot, and have fun experimenting!
I just got an instant pot and am coming up a small chicken for my first meal on it. I want to make bone broth from the carcass, but with it being so small there wouldn’t be 3lbs of bones. Can this recipe be scaled down? If so, how much water do I add? I’ve never made bone broth before so I don’t even know how much weight the bones will be from the 3lb bird…. Help?
Joanne, if you have room in your freezer, just freeze the carcass, and the next time you cook a chicken, you can do this recipe with both carcasses added. However, if you want to try a mini batch, I would say to just add enough water to cover the carcass, but not more. Let us know how it turns out.
Joanne, you can cook the whole chicken, take the meat off and cook the bones again in the second batch. That way you get both – good meat and great broth!
Can you reuse the bones that you just used to make another pot ?
Berneda, yes you can but the flavor won’t be as rich with the second batch. Sharon shared a cool technique in the comments above. She fills her mason jars 1/2 way with the broth from the first batch. Then fills them the rest of the way with the broth from the second batch. She then stirs to blend, and the end result is double the broth from the same bones, but each jar has an equal amount of nutrition and flavor.
Thanks for mentioning my technique. I would like to add that this method doesn’t generate a nice gelled product as the final result with bones alone. If I want a nice gel, chicken wings are good, and after the first batch, I strip the meat and put everything else back in the pot for the second batch. This last time I did it slightly different – I used a whole natural chicken (less junk pumped in it and more bang for my buck) – but not much collagen. However, I did just do the roasted beef knuckle and the chicken, vinegar, and salt alone in the first batch for 2 hours, then for batch 2, I had bones, vinegar, salt, and much more veggies than you call for, but only cooked it for 1 hour. Tasty. And nothing worth keeping afterwards (except the broth of course).
Great variations, Sharon!
Thanks for your quick reply!! I also wrote to the Instant Pot people and here is what they said, “With the 8-QT model, you can set the soup setting to 240 minutes. If you would like to cook it for a longer period of time, you could also re-start the cycle once it has finished.”
Hi Eileen! This post inspired me to purchase an Instant Pot and try your bone broth recipe!!! I love it!!! My question is this: you stated that 120 minutes was the maximum allowed pressure cooking time. I purchased the new 8 quart Instant Pot and I can set it for much longer. Today I set it for 3 hours. What benefit, if any, is there to pressure cooking the broth longer? Is there an optimum amount of pressure cooking time?
Fascinating! I don’t have the 8-quart model. What’s the maximum pressure cooking time for that model, Diana? There are pluses and minuses to cooking it longer. You’ll extract more nutrients from the bones, but any veggies you add have a tendency to get bitter with longer cooking times.
Another interesting idea is to make a desert from bone broth. I tried a very old “Lemon Calf’s Feet Jelly” recipe, and it turned out good. I am wondering if it is healthy though….
Hi Anna. The bone broth dessert recipes I’ve seen require too much sugar to overcome the flavor of the broth. Bone broth is meant to be savory, so I think it’s better used in things like soups and stews. If you want to make desserts with gelatin, I think it’s better to buy gelatin powder for that purpose. I like Great Lakes brand grassfed gelatin, and I use that when I make Juice Jello and Apple Cinnamon Gummy Candies.
How many weeks can you leave the broth in the refrigerator if there is a lot of fat on top and the seal is not broken? How can you tell if its gone bad?
Hi Mary, according to this article, up to 6 months as long as it’s a perfect fat seal, where no oxygen can get in. However, she says at the bottom that she personally freezes broth she doesn’t plan to use within 3 weeks, to be on the safe side: http://www.myhumblekitchen.com/2014/11/keep-homemade-broth-preserved-6-months-canning-freezing-required/
I don’t know if this is helpful or not, but here’s the way I’ve done the broth in the Instant Pot – which I think is my all time favorite appliance other than the irreplaceable microwave… I make the broth like the recipe above, but then I strain out all the veggies and bones and such, put the broth in jars only filled half full. Then I put a couple of pieces of fresh veggies in, put the bones and veggies I took out from the first batch, and fill it with more filtered water. Yes the second batch is a little weaker, but there’s no confusion later on which bones have been used how many times (cuz there’s no really good way to tell if you’re saving the second use ones or the third use at that point). So when the second “slightly weaker” batch is done, I strain it all out again (this time throwing it all away cuz we don’t have dogs or a compost pile), and top off the previous half filled jars. This melts the layer of fat, and it all blends and a new layer of fat rises to the top. And even running 2 batches off the same material (ok, so mine wasn’t just bones – I used chicken wings and then ate the meat), the broth all gels great! I do have to admit that the wing meat definitely tasted better after the first run than it did after the second one. Thank you for making the recipe so easy and delicious!
Cool technique, Sharon! So, just to make sure I understand it, you make 2 batches of bone broth back-to-back. and the jars are filled 1/2 way with the first batch and 1/2 way with the second batch?
Absolutely! And it works super and tastes fantastic!
Thanks so much for this recipe. Just made the broth and it came out fantastic. My son ate 3 cups right away. I used to make it stove top but its so hard to control the over boiling and keeping an eye on it is hard for 24 hours straight. Now enter Insta Pot! the most perfect broth I have ever seen. Golden deliciousness!
I have one questions. You recommend refreezing the bones that were just used to make the broth. I used chicken bones and they are completely soft and fall apart when I press on them. Are they still good to refreeze to make another batch? I would love to do that but not sure if they are all “used up”.
Anna, what a great testimonial! Regarding your question on freezing the bones – if your chicken bones are falling apart, they are indeed “used up”. The beef bones tend to stand up better to repeated use.
Hi! Do you think it’s better to drink bone broth alongside a meal or separately? Or does it not matter?
Hi Katie. I don’t think it matters. Whatever you prefer!
A couple of questions for you since my last reply was never posted… 1. If I want to cook fish heads with my chicken, are there any problems with that given that fish normally cooks a much shorter time (and we’re talking fresh water fish like bass, crappie, striper)? 2. What modifications would you make to the above recipe for an 8 quart IP instead?
Thanks in advance!
Hi Sharon. I was on vacation when you originally posted your comment, so you’re getting a double-reply today. 🙂 I’ve never combined fish and meat in the same broth, so I recommend experimenting. Try it with the regular cooking time once, and with the shorter fish cooking time for a different batch, and see which you like better. As for modifying the recipe for the 8 quart, you would want to increase the bones (or fish heads) to 4 lbs and increase your vegetables slightly as well (maybe a small onion, large clove garlic and 4″ piece of carrot or celery).
I am just drooling to get one of the IP’s to replace the unhealthy non stick coating with my slow cooker. I do have a couple of questions for you before I get started with this:
1. Can you cook a whole turkey in this IP (maybe the 8 quart)?
2. Can you make fish broth in it (using the fish heads of non oily fish)?
3. If making fish broth is ok, I’m thinking of mixing oxtails in with the fish heads to give more flavor, but enjoy the thyroid healing properties of the fish broth. What do you think about that?
4. I like to experiment with the veggies – what are some that are definite no-no’s to include (makes it bitter or something else unpleasant)?
Thanks in advance for your help and I am a brand new reader of yours, but will be a regular reader now!
Hi Sharon. Sorry for the delayed reply. I was on vacation. 🙂 To answer your questions: (1) I don’t think a whole turkey would fit in any size Instant Pot. (2) As for fish broth, yes – you can absolutely make fish broth in this, but I would cut the cooking time in half – 60 minutes instead of 120. (3) Intriguing – let me know how it turns out. (4) As for the veggies, I would stay away from nightshades, since they’re inflammatory. And my understanding is that onion skins can make a broth bitter. So can the brassica family of veggies (cauliflower, broccoli, cabbage, brussels sprouts, etc.) Enjoy your experiments!
PLEASE take me off this subscription. I have unsubscribed three times now only to have the emails continue to come.
Sorry about that Carol. I just updated the plugin, which should correct that problem. In the meantime, I went in manually and deleted your subscription.
Seriously am so grateful for you and all the amazing and easy recipes you provide! Thank you thank you thank you!
My pleasure, Katie!
Hi! A few questions here! My daughter cannot have apple or carrot due to allergies… will this be okay with white vinegar and no carrot?
Hi Rebecca. It’s fine to remove the carrot. I don’t recommend distilled white vinegar because that’s grain-based, but you can substitute white wine vinegar or even lemon juice. Both add the acidity that helps pull the nutrients from the bones.
Hi, I just purchased the 8 quart instant pot, it should arrive tomorrow. Would you increase the cooking time for the larger size? Do I need to defrost the bones before adding to the pot? Do you recommend blanching the bones, especially since I am using chicken feet and a chicken back. I heard that you should brown certain bones in the oven, do you do this? What are your thoughts on adding turmeric and ginger, I’m thinking maybe just a tiny amount because of your experience with the vegetables. Thank you!
Hi Monica! I’m jealous. The 8 quart is on my personal wish list. 🙂 There’s no need to increase the cooking time for the larger pot – the pressure does the cooking – it will just take a little longer to reach full pressure in a bigger pot. That said, you will want to either reduce the liquid or increase the ingredients in this recipe by 25% or you’ll get a watered-down broth (since this is written for the 6 quart). As I say in the recipe, frozen bones are OK. I use them regularly myself. Feet are the only bones I blanch; the chicken back doesn’t need to be. As for browning bones in the oven, some people say that improves the flavor, especially with beef marrow bones, but I don’t think you need to do that with chicken. As for turmeric and ginger, I’ve tried that and it adds a unique flavor to the broth. I recommend you start with this recipe for your first go-round. Then, add ginger and turmeric next time, so you can compare and see which you like better. Then continue your experiments going forward. It’s fun to have variety. Fresh herbs are nice to throw in sometimes, too. I especially like adding a sprig or two of fresh rosemary. Enjoy your new Instant Pot!
Hi there Eileen,
Just wanted to let you know that it was the silicon seal that was infusing the recipes w/ horrific odors. I put it in the dishwasher w/ extra heat, ran it twice and it still smelled terrible! Wow, so I ordered new ones at Amazon…your spot on, it must be taken out & cleaned after use, duh! Don’t know why I never thought of it, it’s right in the manual. Thanks for a great & helpful blog!
Thanks so much for reporting back, Derrick. That will help other people troubleshoot who have the same problem.
Hi Eileen ,
I’m very baffled as to why my broth smells So foul (& taste foul). I have an Instapot that I’ve used several times to wonderful dishes. Last week I made a chicken broth, using your beef recipe (but chicken) and I came home to a horrible odor (my neighbors complained). I washed the Instapot lid and cooking container very well and thought I’d try the beef broth recipe this week.
This time I bought frozen grass fed bones from Whole Foods (no oxtail), baked them first at 400 for 75 minutes, added the rest of the ingredients and came back 3 hours later – again the same terrible smell. I took out the clear rubber ring in the lid and washed it 4 times, it still carries that exact hellish odor….and the broth has cooled and tastes as foul as it smells. The odd thing is the chicken and beef have the Same foul smell. I’ve made about 8-9 recipes in the Instapot (it’s fairly new) and have never thought to take out that ring in the lid and clean it, even though I clean the interior of the lid well….perhaps that rubber gasket is just crawling w/ bacteria from the past recipes?
I’m at a loss here, any ideas as to why it smells & taste so foul?
Thanks much!
Derrick, there should be no smell when you use the pressure cooker setting. It seals the pot and doesn’t allow any steam (or odor) to escape. In fact, this is one of the reasons a lot of people prefer the Instant Pot method. So, something is definitely wrong if there’s a strong smell and you have the vent closed to the correct position. I recommend contacting Instant Pot customer service directly. But yes, you absolutely should clean gasket after each use.
Hi Eileen! Love your blog and podcast.
I’m considering trying PC/Instant Pot broth. My roommates hate the smell of the stove top process and I don’t like watching over it for so long. I tried using the pressure cooker in my room to avoid the smell in the kitchen but I think the “low” setting is still too high because it ends up with a rolling boil for most of the time and my broth doesn’t come out very gelled. Perhaps the PC method is the answer!
I am wondering about the smell and skimming off the scum. Does it smell less with the PC? Also, I usually skim off the grey foamy stuff that rises to the top while the broth is heating up on the stove top. I find it isn’t a huge deal but does make for a clearer, better tasting broth. I guess it’s just a trade off for all the benefits of the PC method?
Thanks!
Hi Cass. Since the Instant Pot Pressure Cooking setting seals the pot, there is no smell, so that will make your roommates happy. I personally don’t skim my broth. I simply strain it once it’s cooked. If you want to do a skimming step, cook the broth at high pressure for 10 minutes, carefully depressurize, skim the broth, and then re-set for another 2 hours at high pressure. Lastly, for a gelatinous broth, follow my tips above in the “How do I make it gel?” paragraph.
Hi Eileen,
I just bought an instant pot and have been making bone broth. I’ve noticed that my broth does not gel as well as when I used my stove-top pressure cooker. I’m wondering if it is because I have been using the soup setting for two hours and I see you use the manual setting for 2 hours. What are your thoughts?
Thank you for your post.
Hi Doreen. That’s definitely one possibility, because the soup function is designed for a slow and gradual increase of heat and pressure, so the end product wouldn’t be cooked as much. However, another possibility is that your stovetop pressure cooker is likely smaller than the Instant Pot. Gelling is largely due to the ratio of water to bones. So, also try reducing the amount of water you add to the Instant Pot.
Thank you very much, Eileen. 🙂
I bought the Instant Pot and made 2 Pressure Cooked rump roasts in it. I think the slow cooing method would be more tender, though. Yet, it was ok – done in 55 minutes.
I know organic is ideal; but is it ok to use non-organic bones?
I can’t always afford organic meats as much as I’d like. Thank you.
Hi Adrienne. I agree with you that slow cooked roasts are more tender, but sometimes the speed is what we need. 🙂 It is OK to use non-organic bones, but the least expensive bones would be the ones leftover from the meals you cook. The carcass from a roast chicken, bones from pork chops, roasts, steaks, etc. For more tips on getting the most for your money on the AIP, here’s a good article: Grass Fed Meat on a Budget.
Thank you so much Eileen for posting this tutorial! I do not think I would have mustered the courage to use my Insta Pot without your wonderful guidance! I remember a pressure cooker incident in childhood – a pot of split peas going up and over the entire kitchen. What a mess! I have been pressure cooker shy ever since! Holding your hand – I am less fearful!
Not a typo – I am another Eileen – Eileen Mary to be exact!
Eileen, I’m so glad. I was a little afraid of the Instant Pot myself, so I wrote these steps so clearly to help myself as well. 🙂
I debone the chicken and put the bones, skin and vegies back into the pot with more water and recook. At that point, the bones are soft and I put the whole mess through my food processor and give to my doggies. They love it and I’m sure there is still a lot of good stuff for them in it.
You are a good Dog Mama!
How long should I cook beef broth in my Instant Pot? Actually I bought buffalo bones at Whole Foods, I hope it is good. The guy that worked there convinced me it was more flavorful than beef.
How many pounds should I use?
Also, I have had some beef bones frozen for about a year, would they be ok? And could I mix with the buffalo, or just do buffalo.
Hi Carolyn. It’s fine to use a variety of bones and the recipe above tells you how many pounds and how long to cook. As for the frozen bones – they should still be fine but you’ll want to use them quickly. I think 1 year is the end of the “frozen life span” for any food.
Thanks so much for posting this Eileen – I’m working my way through all of your podcasts and making my first batch of broth today in the Instant Pot – I was a little scared to try a pressure cooker though I read the included instructions of course – it was reassuring the way you broke it down! Thanks for all you do to make this lifestyle less intimidating!
Thanks for the beautiful comment, Abi. That’s exactly what I try to do! Enjoy your first Instant Pot Broth. 🙂
How much broth does this recipe make? I was assuming 3 quarts since that’s what you have pictured…
And do you reuse your bones?
Thanks!
Kristy – yes, it makes around 3 quarts. I do reuse my bones – usually at the ratio of 1 lb. old bones + 2 lbs new, meaty/gelatinous bones for flavor.
Thank you for the Recipe. I was looking for bonę broth Recipe in instant pot.
Right now i make bonę broth for my 6 month old baby. I hope he will enjoy it ! 🙂
Lucky baby!
Thank you so much for your instructions. I loaded up my Instant Pot with bones, veggies, peppercorns and cider vinegar and set the clock to 12 hours on slow cook. When the house filled up with beefy steam, I decided to see if there was a better way. There was! Yours!
Liz – yay! Here’s to bone broth in 2 hours and with pressure cook, there is no steam. I use this recipe myself every week. 🙂
Thank you for the detailed instructions! I’m making my first instant pot bone broth right now.
You’re welcome, Jaschira. Enjoy that healing broth!
My husband brought home round “soup” bones from the butcher shop…will they work? Can I start them in the IP if they are frozen? (He got them fresh but I haven’t had the nerve to try, so I froze them). Seems silly to be nervous…worst case scenario, it’s back to the drawing board (or butcher shop), right? Gotta start somewhere! Thank you for everything!
Yes, they will work, and frozen is fine. Let us know how your first batch turns out, Lisa!
Thank you so much for recommending this! I have made bone broth in the past using a slow cooker. It worked well enough but I really had a problem with the smell of the broth intruding on my living space for the 24 to 36 hours it took to make. I love the smell of meat cooking but for some reason the beef bone broth odor was difficult to take and prevented me from making it on a regular basis. Also, the heat generated by the cooking process was a problem in this hot climate.
No more! It’s 90 degrees in early February but have no fear — the Instant Pot is the answer. No smell, no heat, and a great result. This broth was more gelatinous than previous batches.
Your tutorial is awesome and helped take away the fear factor. I’m all-thumbs with kitchen appliances but after watching the Instant Pot video (available online) and reading your tutorial, I am a pro after one use! I’m so glad I went shopping on your site! Thanks as always for all that you do 🙂
What an awesome testimonial, Shane. Thanks so much for writing!
Thanks for this Eileen! I’m making my first ever bone broth in the Instant Pot I have had for about one week. I love it & your posts are one of the primary reason I got one. So thanks for that too! It’s tough to just get started cooking at the age of 54. I am enjoying my new adventures in cooking though. Keeping my fingers crossed that this will turn out OK.
It’s never too late to learn, Debbie. Welcome to the tribe!
Hi, there! Another 54 year old who never cooks, about to make my first batch of BB in my Instant Pot tomorrow!
I’m thinking about buying this instant pot but it doesn’t hold a lot of bones so it doesn’t make a lot of stock at a time. I don’t make yogurt or rice so is this the best one for me? I would love though to make broth this quick. Thank you for your time.
Hi Berneda. I hear you! I would love it if the Instant Pot was a little bit bigger. However, the speed makes it worthwhile to me. If I need more broth, I can cook 2 batches in 1/4 the time it takes to cook 1 batch the regular way.
Thank you for the very helpful tutorial! I recently bought an Instant Pot especially for the making of bone broth and turn to these instructions each time. They are very clear and easy to follow.
Following a healing diet such as the AIP can be very overwhelming, so I am grateful for the many helpful posts on your site that summarize and simplify the information. Thank you!
Thanks for taking the time to comment, Marianne! I love my Instant Pot for its ability to make broth above all else. 🙂
love this
Help! How much broth is this supposed to produce? I just got an Instant Pot and this was the very first recipe I tried as I was excited to make bone broth in such a short amount of time. Mine was a total fail though as almost all of the liquid evaporated, so I was left with hardly any broth! I did all of the checks mentioned in the manual before first time use. I did notice that steam was coming out of the little knob for the entire cooking time so I guess that is where it was going. Any idea what I am doing wrong to cause this?
Emily, it sounds like it didn’t seal. Did you follow the steps in my recipe? When the pot is building up pressure and the display says “On” – some steam will release as it heats up, but then it seals and you’ll hear the silence. At that point, the display switches to count down time. No more steam should come out of the pot after that. If it does, something’s wrong. Only a sealed pot can pressure cook, and no liquid evaporates under pressure.
Thanks for the quick response…that makes sense. I did follow the steps in the recipe – seal appeared to be in place. Maybe something is wrong with it, but I will try again. At least now I know not to waste time waiting for the countdown if steam is releasing. Thanks!
The switch on top needs to be set to “sealing” and not “venting.” Sounds like that may have been what happened?
I can’t have vinegar, I’ve seen some recipe’s that substitute lemon juice for the vinegar. Would that work in this recipe? How much lemon juice would I use? Thanks for any help!
Yes, that should work Jennifer. Just use the same amount – 1 tablespoon.
I really want the benefits of bone broth but I’m concerned about the possibility of feeding bad bacteria. I’ve done a fair amount of reading on this, but still feel confused. I have an appointment with a doctor whom I hope will test me for SIBO, but the appointment is a long way off. Until then I’ve been following AIP + Allison Seigecker’s SIBO specific diet to be on the safe side, but that makes my diet extremely restricted. Do you have any thoughts on this? I know you are just sharing your personal knowledge and experience, not as a practitioner. THANK YOU for your amazing service and inspiration.
Hi Sara. Did you listen to my podcast on SIBO? If not, it has lots of good information, and Dr. Keller recommended avoiding bone broth if you have SIBO and making meat broth instead until your digestion has healed. She describes how to do that in this article on her blog.
thanks so much, Eileen! I finally got an instant pot (have never had a pressure cooker) and this was my first item to try. I was getting nowhere with the user manual, so this was VERY helpful!!!
It’s confusing the first time you use it. I wrote such detailed instructions in this post to use as a cheat sheet myself the first few times. Now, I have it memorized though. Enjoy!
thanks, Eileen! I have to tell you my broth gelled up so nicely! I can’t remember the last time I had a gelled broth from my crockpot – which I always run for 48 hours. I was super excited!
Thank you SO much for the continued help Eileen – you’re the best! X
Thanks for your recipe! I’ve been making beef bone broth using a slow cooker for a several months now. I just got an Instant Pot, and am excited to make it with the pressure cooker feature in 2hrs. instead of 24+. Your guidelines are very helpful. One question: you mention filling the pot with water up to 1-3″ below the max line. I notice the manual recommend for soups to fill it only 2/3 full for safety reasons. Of course, that means less soup. Have you found that filling it up as much as you do is safe and without problems?
Thanks again!
Greg
Enjoy your Instant Pot, Greg!It’s perfectly safe as long as you don’t fill it past the max line. Less water makes a more concentrated broth, though, which some people prefer.
Thanks!
— Greg
Oh thank you so much Eileen! I really appreciate your helpful and informative reply. I have just bought my Instant Pot and cannot wait to try it out!
Just one other query – sorry! I read that using the pressure cooker Instamt Pot feature to make bone broth is not as beneficial as using the slow cooker feature of the Instant Pot since not as many nutrients/gelatine etc will be extracted from the bones. Does this seen correct to you?
Thank you again!
Jessica
Actually, I’ve heard the opposite – that the pressure cooker pulls more from the bones. Honestly, though, I’ve never seen a scientific study comparing the two. Both are very healthy ways to make broth, and neither is superior. The pressure cooker is just faster, and with my busy life, I really like that. Enjoy your Instant Pot! One tip: Slow Cooker “Normal” on the Instant Pot is the same as “Low” on a regular slow cooker. Don’t use Slow Cooker “Less” on the Instant Pot – that is almost like a warming function. If you haven’t seen it yet, here’s an AIP Instant Pot Recipe Roundup.
I am looking for a way to make bone broth in a lead/toxin free cooker and this Instant Pot with its stainless still bowl looks ideal. However I’m a bit worried that you say the pressure cooker function doesn’t release the water so the result is less concentrated.
If I use it on the “slow cooker” function, would it then release the water and be more concentrated?
Sorry if I’m being a bit dense?!?
Hi Jessica, you can certainly use the Instant Pot as a slow cooker and it will evaporate some of the water. But I recommend using the pressure cooker function for speed, and just add less water at the beginning. That will automatically concentrate your broth. Do some experimenting. Try filling to 3 inches below the max line to start. If that’s not concentrated enough for you, next time you can just barely cover the bones with water. You can also fill the pot with water (to 1 inch below the max line), make the broth according to the directions in this recipe, and then when it’s done, release the pressure, remove the cover, and then use the Saute function to simmer the broth uncovered for an hour to concentrate. You have lots of options! 🙂
Eileen, this recipe has made my life a heck of a lot simpler! I wanted to thank you for freeing up valuable time in my day.
I found this recipe, easy, intuitive and simple to follow. The best part? I get gelatinous bone broth in 2hrs instead of 24hrs. Another neat bonus is that my final broth has a lower histamine count that my previous slow-cooked broth meaning that I can consume more of this great gut healing food. Win Win!
Awesome, Rory! I’m so glad you love this recipe as much as I do. Great tip on the histamine issue – thanks!
I had the same trouble as Carol. I followed the directions to a T and had bison marrow bones, grass-fed beef meaty stew bones, and a knuckle. They were frozen, but it said that was OK. It smells gross and I make bone broth in the slow cooker all the time so I know the smell. It’s also super pale and not gelatinous at all. What a waste. I so wanted this to work, but I am 10000% sure I followed the directions exactly. Bummed. 🙁
I don’t know what to say, Bree. That would be disappointing! That has never happened to me, and I make bone broth in the pressure cooker every week. I can’t imagine why the smell would change based on cooking method. To me it smells the same whether I make it for 24 hours on the stove or 2 hours in the pressure cooker. The only thing that shifts the smell in my own experiments is the type of bones I use. The pigs foot provides lots of gelatin for example, but doesn’t smell fabulous, so by adding meaty beef bones, I improve the smell and flavor and still get the benefits of the gelatin.
P.S. One final thought. Did you wash the pressure cooker before use? Pots and appliances often have oil or coating from the factory, and that could have affected the smell/flavor.
Hi, I made some beef broth and I must have done something wrong. The smell is SO strong (not in a good way) and I’d rather toss it out than eat it. I’m so nauseous from the smell! I’m assuming that’s not how it should be? Any advice is welcome!
Hi Jaclyn. I doubt you did anything wrong. Bone broth smells very different than meat broth, and some people don’t like the smell. Here are some tips: (1) roast your bones before using them for broth. (2) Always include some meaty bones for flavor and scent. (3) And many people who don’t like the smell of beef or pork bones, do like the smell of chicken bones.
hmm… I did have one large meaty soup bone in with them. Maybe I’ll try the simmer thing next time. I’m really disappointed. I made chicken broth (again) the next day and it was darker than the beef broth! I don’t understand why the color was so poor…. There’s not much water in there to begin with. lol. We’ll see! I’ll try again in a week or so.
I just made beef broth in the pot. It wasn’t very brown or flavorful. It was pale like chicken broth and rather bland. Is this normal? Any suggestions on how to make it darker brown and more flavorful? I used a little over 3 lbs of bones and the ingredeints you list other than using garlic powder and onion powder rather than the real stuff because that’s what I had on hand. Is it because it’s a pressure cooker that the broth isn’t dark brown??
Hi Carol. I recommend two things: Make sure you use meaty bones as part of the mix. Boney bones don’t impart much flavor. If you roast the boney bones that helps, but it doesn’t replace the need for some meat. Lastly, you might want to condense the broth. With pressure cookers, no liquid evaporates, which is very different from other bone broth cooking methods. You can condense it two ways: (1) Add less water to begin with or (2) After the broth is made, remove the cover and use the saute feature to simmer the broth uncovered, evaporating the liquid until it reaches a flavor you like.
I just bought one of these things. You state that 120 minutes is max time for the cooker yet you also state that it takes 2 and a half hours to cook the bone broth. What do you do? Restart it for 30 minutes?
Hi Bill. Pressure cookers take time to build up pressure, and you need to account for that in your cooking time. That’s the extra 30 minutes. I describe this in the recipe directions (#4). Enjoy your new Instant Pot! It really is my favorite kitchen tool.
Thank you so much! One more question. The video on the Phoenix site teaches using a I/Pad. I don’t have an I/Pad or I/Phone. She said you need to boil the water in the pressure cooker before you put the bones in it and uses the I/Pad to do that. So my question is if you need to boil it and if so how do you do it manually? Thanks again!
Bill, I’m the Phoenix Helix site, and I have no such video. Whoever that person is must have the Smart Bluetooth-Enabled Instant Pot. You don’t need an ipad or iphone to use the regular Instant Pot. Honestly – you’re overthinking this. Just follow the instructions here in my recipe, and enjoy your bone broth afterward.
Thank you so much for sharing this recipe. I would like to share it with my small but growing community, with your permission. If you permit, please advise how you would like to be linked back to and credited. Thank you. This is really good stuff.
Hi. I’m glad you like the recipe! Please don’t reprint it, though. Blogger etiquette is to share the link, so people will come here to read the recipe. Thanks for spreading the love!
Thank you for giving straight forward information on making stock. My instant pot arrived yesterday. I have not used a pressure cooker for years and wanting to make stock. I didn’t know which buttons to press for doing stock. You explained everything clearly and I now know to do it manually. My butcher gave me a bag of bones yesterday so I now going to follow you instructions. Thank you Sandy
You’re welcome. Enjoy your first healing batch!
I had a huge fail the first time I made bone broth with the Instant Pot–and unfortunately I made both chicken and turkey bone broth that day. When I took a jar out of the freezer and opened it, the smell was horrible. Both one jar of turkey BB and one jar of chicken. I haven’t had the heart to clear the others out of the freezer yet. I thought I followed the directions above, though I don’t think I left the jars sitting out for an hour after filling them. Any ideas what might have gone wrong and what I can watch for this next time?
How totally bizarre. The Instant Pot shouldn’t change the smell of broth at all, unless you didn’t wash the pot before use, so there might have been a chemical coating from the factory that got incorporated into your broth? Or if the bones had been stored too long and gone bad? Suzanne, have you had success with other bone broth methods before, or is the Instant Pot your first attempt?
I have made bone broth a number of times in the crockpot with no problems. And I don’t think this was the first time that I had used the Magic Pot, though I did wash it first. I used new frozen bones for the chicken broth, and leftover bones from my freezer for the turkey.
I made beef bone broth yesterday afternoon and made sure to let it cool for an hour before refrigerating. It seems like it smells fine this morning but hasn’t gelled. I cooked it an extra hour and a half this time just in case.
I love bone broth and make it all the time. The smell is always beautiful. I add bay leave, carrot, celery and peppercorn and the aroma is delicious.
We just purchased an electric Pressure Cooker. Isn’t this the same thing?
Not quite. The Instant Pot is a lot of tools in one. It’s a slow cooker, pressure cooker, rice cooker, vegetable steamer, yogurt maker, etc. One of the things I like about it is that it saves cabinet space, because it replaces so many other appliances. However, as far as this recipe goes, your electric pressure cooker should work just as well. Enjoy!
Thank you, Eileen! I got an Instant Pot for Christmas, and I keep forgetting which buttons to push for making bone broth. Every time I try to make broth, I would take more than ten minutes of internet searching to figure it out. Now I can save your post!
I can so relate! I wrote this post so detailed, so I’d have a reminder list myself. 🙂
Thank you Mrs. Laird for this info.
I sometimes flavour it with any of these: lime, fenugreek leaves, Indo bay leaves, turmeric, ginger, lemongrass stalk, galangal or lesser galangal root. Are all of them AIP friendly?
Excellent choices! They’re all AIP-friendly.
Hi Eileen – Great info. Buying my InstaPot today! I am curious, why do you throw away the meat? When I make broth in my crock pot I always scarf that stuff down. Is it not safe to eat? Thanks!
I throw out the meat because it’s usually flavorless, with all its flavor now in the broth. It won’t hurt you, though! Enjoy your Instant Pot!
Hi,
In your directions, you mention that if the fat is cracked or thin, then it will only last for five days. How does the fat content connect to how long it lasts? What is ideal and what bones allow for more fat? Thank you for the great information.
Hi Yvonne. The thick fat layer hardens and acts like a vacuum seal and prevents mold/bacteria from forming on the broth underneath. Every broth I’ve made has had some fat, but it varies, and since fat rises to the surface, usually the first jars of broth I fill will end up with the thickest layer. So, I eat the “thin fat” jars first, and then move onto the thicker fat jars that I know will keep longer. As for the thick fat layer itself, you can simply melt it along with the broth, or remove it when you open the jar and use it in other cooking.
Hi Eileen,
Goodness gracious I never knew there was such a thing! Have you tried a roast in it yet? Thanks for the content–you are an easy to take blogger! When I’m ready to get an Instant Pot for myself, I’ll be sure to buy it through your site.
Hi Blair. So far, I’ve only slow cooked roasts in the Instant Pot, but I do plan to try pressure cooker roasts soon. Nom Nom Paleo adapted her slow cooker pork roast recipe to an Instant Pot one. You can follow that recipe exactly, or use it as a template for adapting other slow cook roast recipes. The cool thing is that the cook time was just 90 minutes for a 5 lb. roast: http://nomnompaleo.com/post/111934821818/pressure-cooker-kalua-pig
Roasts in the Instant pot r great. The veggies are well cooked but not mushy. I used the roast recipe in the book that came with the pot.
I used the same method for cooking corned beef and cabbage and it was better than the crock pot.
Faster and better? I love that testimonial. Thanks, Cindy.
i have been making pressure cooker broth for a while. It is the bomB. Seriously so great. It is time for me to buy a new PC but is the instant pot really that great or is everyone in the paleo community getting money from instant pot to advertise?
Hi Lorelei. No – none of us have a relationship with the Instant Pot company. They haven’t been shipping free pots to bloggers and asking for posts, although I can see why you think they have. Some of us do have an affiliate relationship with Amazon (I do) and when you buy anything on my blog through an Amazon link, I get a small commission, but it doesn’t change your price, nor does it affect what I choose to write about – because anything we link to gives us the same commission, whether it’s olive oil or an Instant Pot or an AIP cookbook. I know people who use stovetop pressure cookers and love them. I’ve never used one, because I didn’t want to have to monitor the pressure, like Barbara said in her comment. With the Instant Pot, I can just set it and walk away. I also like the fact that it does have other uses. I gave away my slow cooker when I bought the Instant Pot, so that saves room in my cabinet. And while I haven’t yet experimented with the other functions yet, I know a lot of people who have, and they like using it as a steamer, rice cooker, yogurt maker, etc, so that’s also one of the reasons it’s so popular. It’s many things in one. But if you love your stovetop pressure cooker, stick with it. I don’t think you need to switch to the Instant Pot, if the other factors/uses don’t appeal to you.
Thank you for your response.
Hi lovely Eileen – I have yet to see Instant Pot available down here in Australia (unfortunately) BUT I bought a Fissler pressure cooker last year and it has changed my bone broth-making life forever. SO good!
Stovetop pressure cookers work, too! Here’s to fast food on the AIP. 🙂
Thanks for this information, Eileen. I’ve been wanting to try pressure cooker bone broth, but it needs constant watching on my electric stove and takes too long for me to stay that time in my kitchen…but the Instant Pot will let me walk away – I’m getting one right away! —and now a sort of dumb question —When I’ve made bone broth (slow cooker) with marrow bones and cook it a long time, the marrow emerges from the bones (as I’m sure it’s supposed to) but I just sort of -eek!- don’t know how to deal with it. I know it’s good for me to eat it, but I think I need some suggestions more than to just dig into it with a spoon. And it seems like it gets strained out and maybe gets tangled up in the fat and “debris” of straining and then I’m just sort of at a loss. I know I shouldn’t throw it out…..Please enlighten me. And many thanks for your advice!
Hi Barbara, I know just what you’re talking about, because I’ve seen the gooey marrow as well. Here’s my take on it – the nutrients from the marrow have dissolved into the broth, the same as happens with the bones and vegetables. So, there’s no need to eat the marrow leftovers. If you roast bone marrow, you eat it directly, because it’s been cooked such a short period of time, and apparently that’s delicious. My guess is the leftover broth marrow would taste pretty flavorless. Does that make sense?
That does make sense. Thanks so much, Eileen! My Instant Pot is arriving any day and then TA DAH. Can’t wait to try this.
I blend in my marrow and it’s lovely.
So if it has released from the bones, how do you separate it out from the fat. I don’t mind some fat in my broth (a little- yum), but it all seens to get so mixed together with strainable gunk and melted fat that you want to congeal in the fridge and lift off. What’s your method??
Hi Eileen. I love your website and posts. Thank you so much for posting this one about the Instant Pot. I have been thinking of purchasing an Instant Pot for a while now but after reading your experience, I immediately ordered it. I’m looking forward to making broth in only 120 minutes and experimenting with the yogurt maker. Have you tried the other features yet? Please post more AIP recipes using the Instant Pot, if you have them and don’t mind sharing. Thank you again!
I definitely plan to experiment, and I’ll be putting together a recipe roundup soon.
Meredith, I just put together a roundup of over 40 Instant Pot recipes. Enjoy! http://www.phoenixhelix.com/2015/06/13/fast-food-on-the-aip-an-instant-pot-recipe-roundup/
Oh, why haven’t I seen this Instant Pot before?! Wow.
It does so much and so fast. Sounds heavenly – an essential tool for a busy mom like me. I’m going to get one right now!
Can’t wait to make my first batch of broth with it…and stew…and roasts…and veggies…oh my, the options.
Right?! It’s hard not to get excited. Happy cooking!
Perfect timing for me! I’ve recently realized I have some histamine issues and I’ve just ordered the Instant Pot. It’s also supposed to allow me to cook some meat directly from the freezer, without thawing first. Thanks for the tips!
Happy cooking!
what’s wrong with using my old-fashioned pressure cooker? I make broth in 3 -4 hours. I let the pressure come down by letting it cool on the stove, then strain.
Nothing wrong with that at all! I’ve never used a pressure cooker of any kind. The Instant Pot is my first experience.
Thank you! I needed this
You’re welcome! 🙂
How much water do you add? I want to make it in a stovetop pressure cooker.
Hi Laura. The Instant Pot is a 6 quart cooker and after adding bones and veggies, I fill it to 1″ below the Max line. If your pressure cooker is the same size, you can follow the recipe “as is”. If it’s smaller, your broth will be even more gelatinous. If it’s larger, you’ll want to leave a few inches below the max line. It will take a little experimenting, but you’ll find the right level for your cooker.